Monday, April 22, 2013

Build Log #23 - Printing Complete, Grandson in the making

Haven't been able to focus in writing a build log since the last entry, it's been one hell of week here in Boston but it's all over now. Props to all the law enforcement personnel in ending that ordeal. RIP to the four victims that passed away, hoping all the best for Texas and everyone else around the globe.

This build log marks the completion of the second set of printed parts for another printer!  The mutant, no-name printer just gave birth to a son or, in retrospect, the Printrbot plus' grandson. 

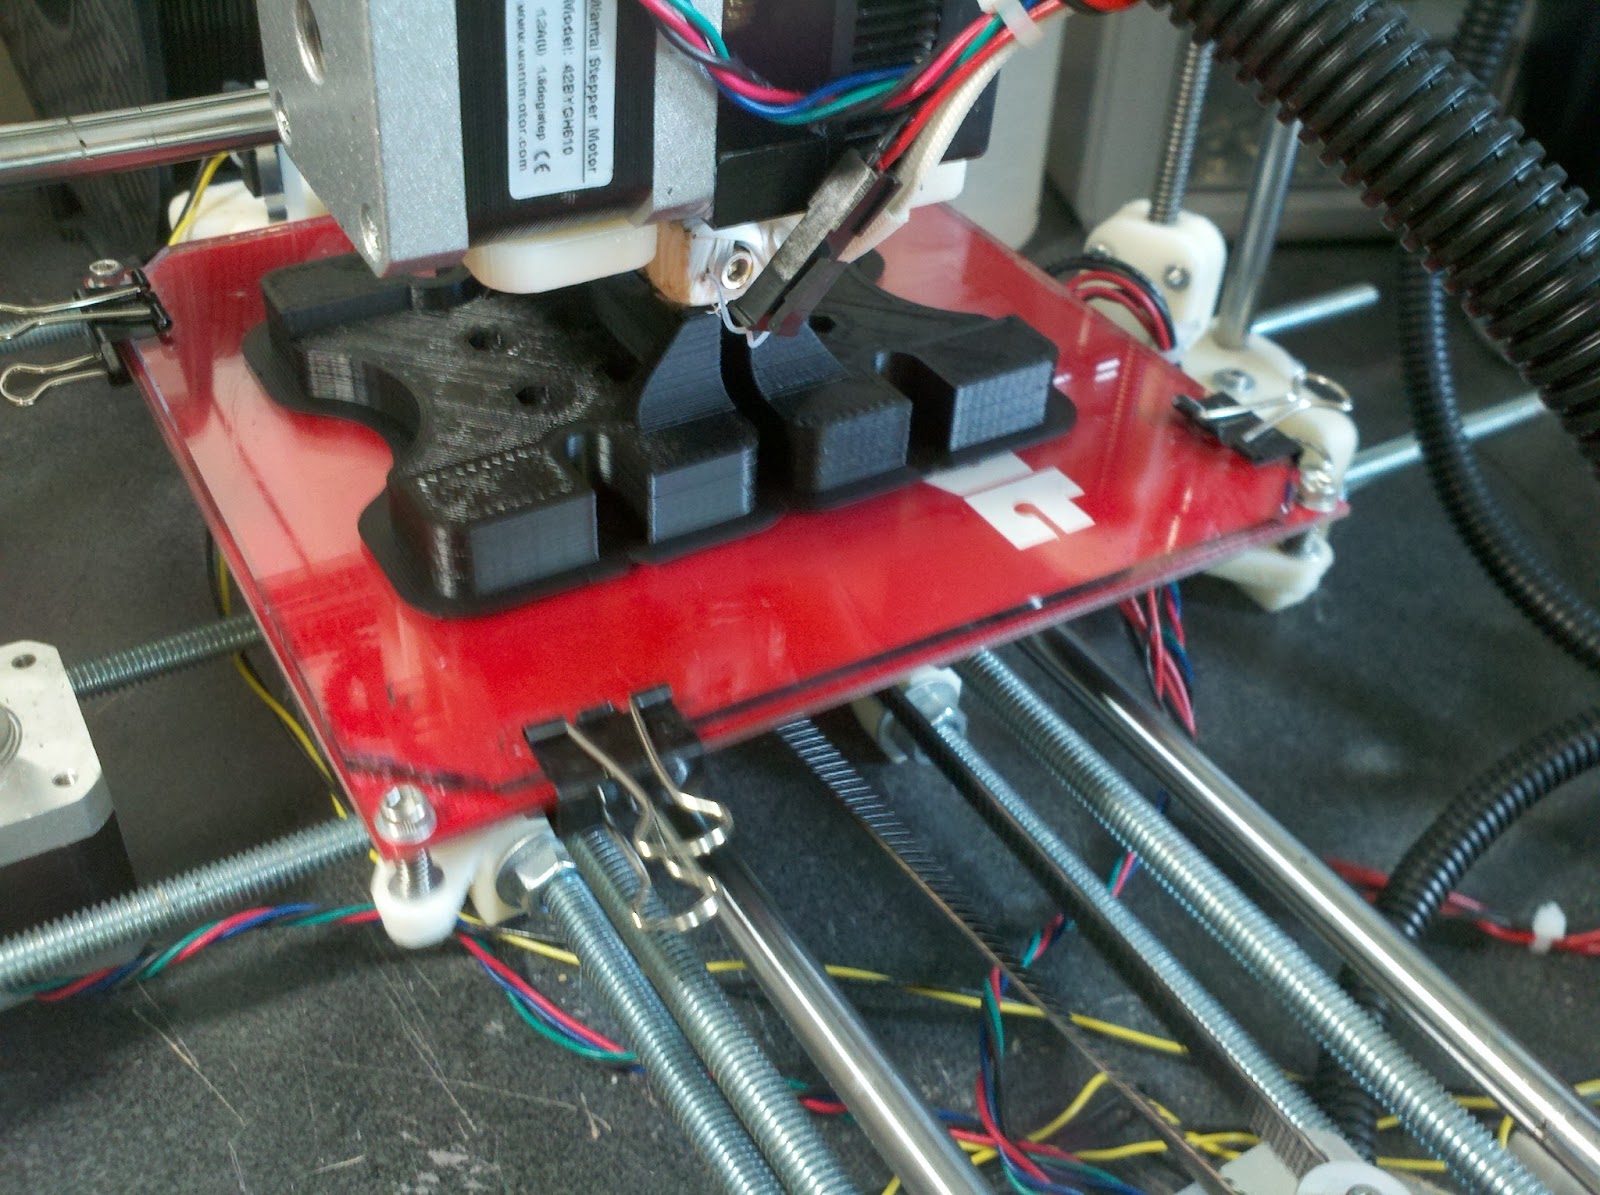
I managed to increase the build area from 120mm x 120mm to 140mm x 140mm by re-positioning the smooth rods, X Frame and end-stops, giving it ability to print the Y carriage without a problem. Self replication is definitely possible without the need for a complex print bed assembly.
Y Carriage
Both Y Carriage A & B. Need to figure a better way to mount the belt to the Y Carriages.
X Carriage, Y Carriage, Adjustable Z endstop and Z Stabilizers
Y Frame with Z Motor/Leadscrew housing.
Missing one endstop, used it on my mutant bot to extend the print bed area.
The whole set! Grandson half done. It has proven itself to be a true RepRap machine.


The BOM for this build is almost complete, going to check through the list to see if I'm missing anything.  I've been documenting this print set, tallying print time and filament usage. The results/notes are shown below as follows:


Results
Total print time: About 30 hours @ 50mm/s perimeter and 100mm/s infill, 1500mm/s^2 acceleration. 
- Total plastic usage: 369 grams of ABS plastic
- Total printed parts: 33 
- Total Vitamins: 315
- Estimated percentage in plastic parts to vitamin: 56/44
- Estimated Cost: $450 or less

Notes

- Layer Height: .1905mm
- 60% infill 
- Only hairspray with Elmer's glue-stick on bare boriscillate glass, NO KAPTON TAPE.
- QU-BD's MBE Extruder v9 with modified raptor drive gear and 608 extruder mod
- 1.75m black m ABS from Makerbot.
- Fully metric.


So what's next? Well, I'm going to build the printer but instead, have someone else to build it from the ground up. I want to see if a less experience person can put this guy together, calibrate and start printing in one day. This will be a hard challenge to tackle, putting together a concise instruction manual that's easy to read. 


Sunday, April 14, 2013

Build Log #22

Printed out the entire X Axis assembly this week.  Slic3r 0.9.9 have been giving me infills much less to desire  than the previous version though I really like the "avoid perimeter" feature. 

X Idler mid print
X Idler complete
X Idler
X Idler
X Motor mid print
X Motor complete
X Motor
Extruder mount with Adjustable Z end-stop assembly

The lighting really brings out the Z wobble but the quality is really not that bad in person.  
The last of the X Axis assembly. Redesigned one of the Z end-stop part, it was a bit too thick. 
X Carriage
X Carriage
X Carriage

Now all that's left is the Y Carriage which is going to be a challenge. I don't think I'll be able to print the Y carriage because my current end-stop setup shrunk my build area. I might be able to squeeze some more length by playing with my smooth rods, just enough to print the last two. If that doesn't work, then it's back to the drawing board.


Monday, April 8, 2013

Build Log #21 - Y and Z Frame complete.

Knobs for the HBP and Z Endstop.

Endstop housing

Knobs

Printing the Z Housings


The Top Z Stabilizers. The endstops I previously printed came out wrong. I recently made a change to the CAD drawing which inadvertently made a section smaller. I had to go back, fix the drawing and re-print.


All that's left to print is the X Motor, X Idler, X Carriage and mount and I'll be done. Hmm that took about a week to print everything. Been keeping a time sheet to see how long each part takes to print, hopefully I can gauge how long it takes to print a whole set. Haven't even decided if I'm going to purchase the vitamins for it but the BOM is almost done.

Friday, April 5, 2013

Build Log #20

Printed out the Y Idler and the Frame brace. Each part takes about 1.5 to 2.5 hours to print. Pretty much printed half the printer already.

Y Pulley Idler 

Y Idler

Shrinkage after cooling off

Little guy printing out the Frame Brace

Frame brace

Frame brace


Thursday, April 4, 2013

Build Log #19 - Grampa?

The new Y Carriage design turned out to be a bust since it ended up being too low for the belt pulley to function properly. I reverted back to the original design but I'm not sure if it'll fit on my small HBP. Ideally, I just want the mutant bot to solely print the new one (grandson) out but if worst comes to worst, I'll call on the service of my Printrbot+. For the time being, I'm going to start printing the Y Frame first while I figure out what I want to do with the Y Carriage. 

The new Y motor came out without a hitch. The glue + hairspray combo really held the prints down so big prints are possible. I had the part fully cool down to room temperature and you can see the shrinkage taking place at the brim. Wow, I'm really impressed on how well the mutant bot came out to be.


Monday, April 1, 2013

Build Log #18 (running out of titles to use)

Finally finished designing a simple, adjustable Z end-stop for my mutant bot. I didn't have any M3 bolts long enough for the assembly so I had to use a #4-40 bolt instead. I also had a bunch of unused wing-nuts to boot so it worked out fine, just looks a bit bulky.
Printed and installed. 

Since I'm almost done finalizing the 2nd iteration, I went ahead and printed out the small parts, two pulleys and two Z rod holders. 

The prints came out nice but I couldn't figure out what was causing these tiny blobs to form. I thought it had something to do with the retraction but after going through a series of retraction settings, I had a feeling something else was in the mix. After inspecting them under a magnifying glass, I noticed there was this wavy pattern running along the X and Y path. I remember reading about this problem somewhere on the reprap forum. Basically it's the result of the belt's teeth bouncing along the "flat" pulley. I didn't think GT2 belts would be affected by this but I guess I was wrong. 

Y Pulley belt flip
Solution: Flip the belt around!

X Pulley belt flip
Minimalistic Endstop
Fired up another print and boom, barely a blob in sight. 

Comparison shot1

Comparison shot2


Slic3r 0.9.9 just came out and I wanted to tackle that torture test print again since I was pretty disappointed on how it came out....I know it can perform better than that. For this print, I'll be using three of these:
  1. Hairspray + Elmers stick glue on the HBP, no kapton tape
  2. Belt flip trick
  3. Slic3r 0.9.9
; generated by Slic3r 0.9.9-dev on 2013-04-01 at 16:25:21

; layer_height = .1905
; perimeters = 3
; top_solid_layers = 3
; bottom_solid_layers = 3
; fill_density = .3
; perimeter_speed = 50
; infill_speed = 100
; travel_speed = 195
; nozzle_diameter = .35
; filament_diameter = 1.63
; extrusion_multiplier = .89695
; perimeters extrusion width = 0.55mm
; infill extrusion width = 0.70mm
; solid infill extrusion width = 0.55mm
; top infill extrusion width = 0.55mm
; support material extrusion width = 0.70mm
; first layer extrusion width = 0.70mm

left: Old, Right: New
The belt trick and the new slic3r's new "avoid crossing perimter" option made a very clean print.  
Old

New
 The cylinder parts still give off some artifacts. It happens most of the time when it finishes it's final perimeter run and slingshots straight to the center for the infill. I think lowering the acceleration might help.
Old


The Hairspray + Elmers Glue combo worked out really well. I don't have to worry about ripping the kapton tape since I'm not using any at all anymore. After waiting for a few minutes to cool down, I laid out some water around the brim to loosen up the adhesion. The moment I loosen the brim with my tweezers, the part literally popped off the glass.