Monday, September 30, 2013

Build Log #38 - New BOM and X Ends

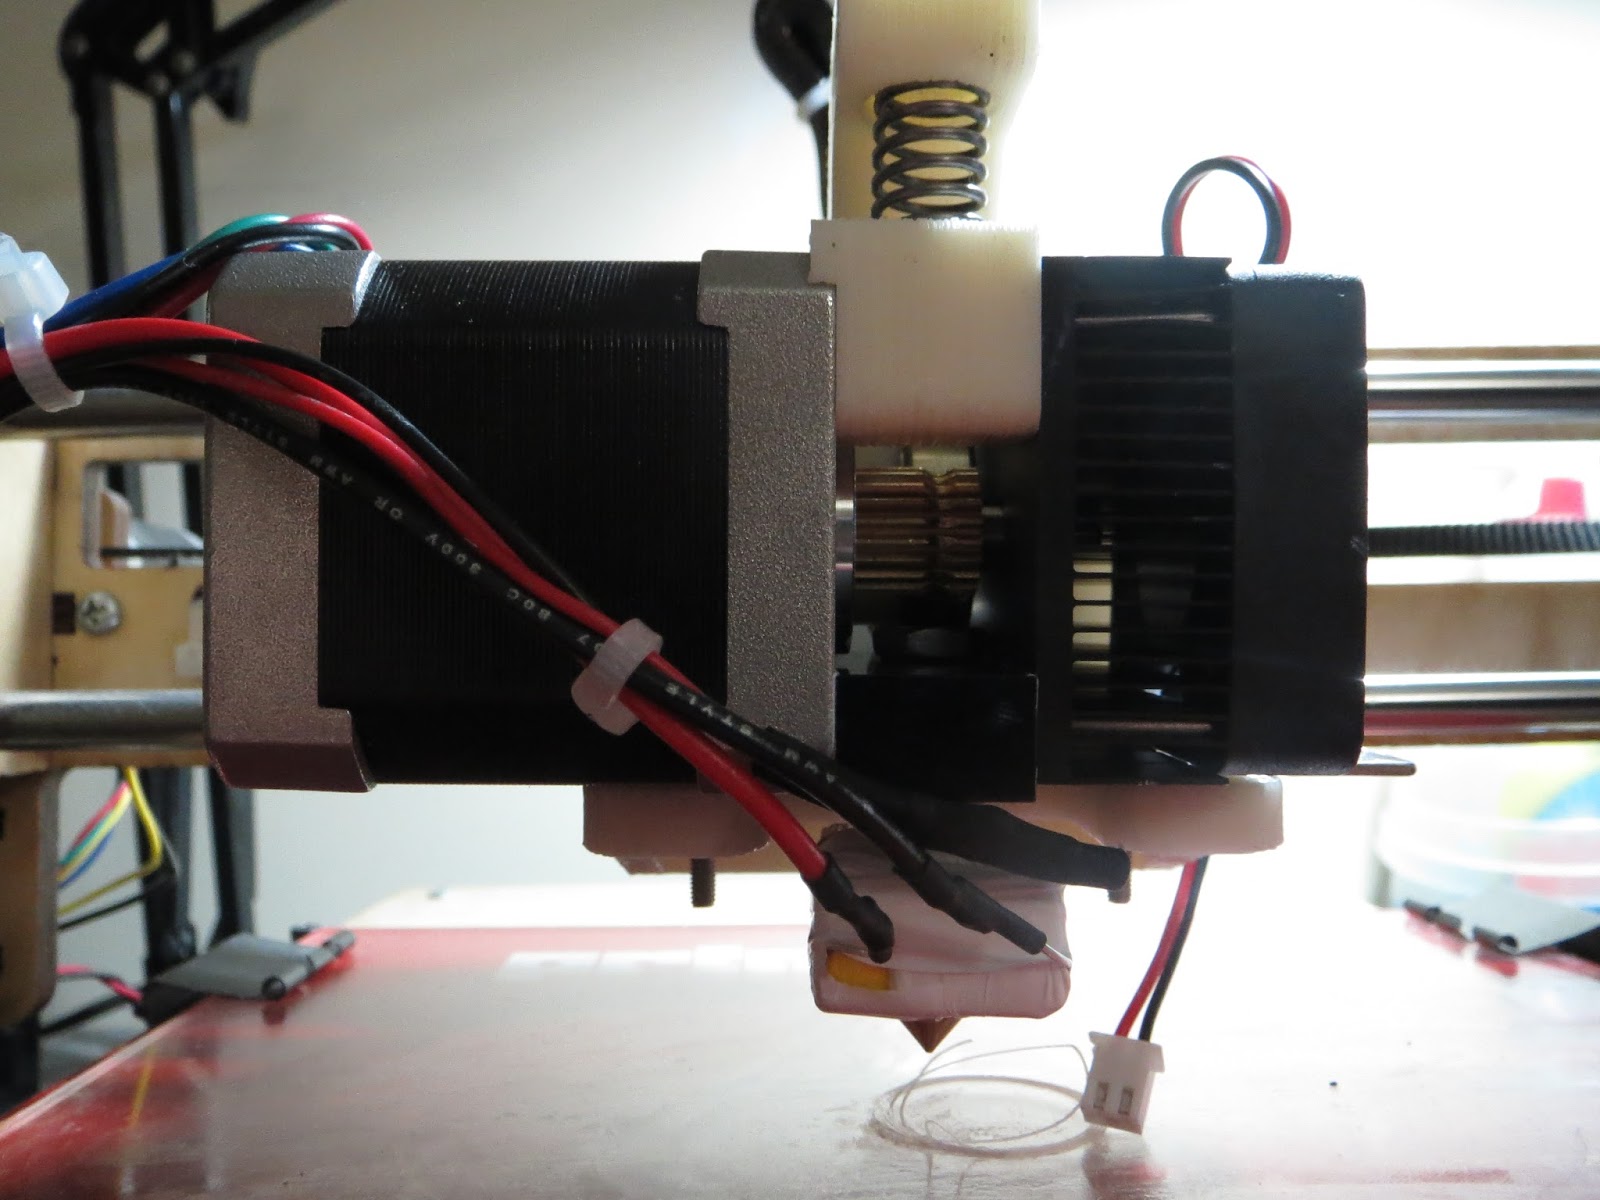
Just uploaded version 4 of the Bill of Materials. Some of the prices have changed but added a few more options as well. I replaced the Wade Extruder in favor of my Direct Drive Vert-Xtruder. It requires lesser parts and was designed to be compact. It is also compatible with multiple hotends and mounts on Wade Extruder mounting holes making it a versatile extruder. 

Get the new BOM here!

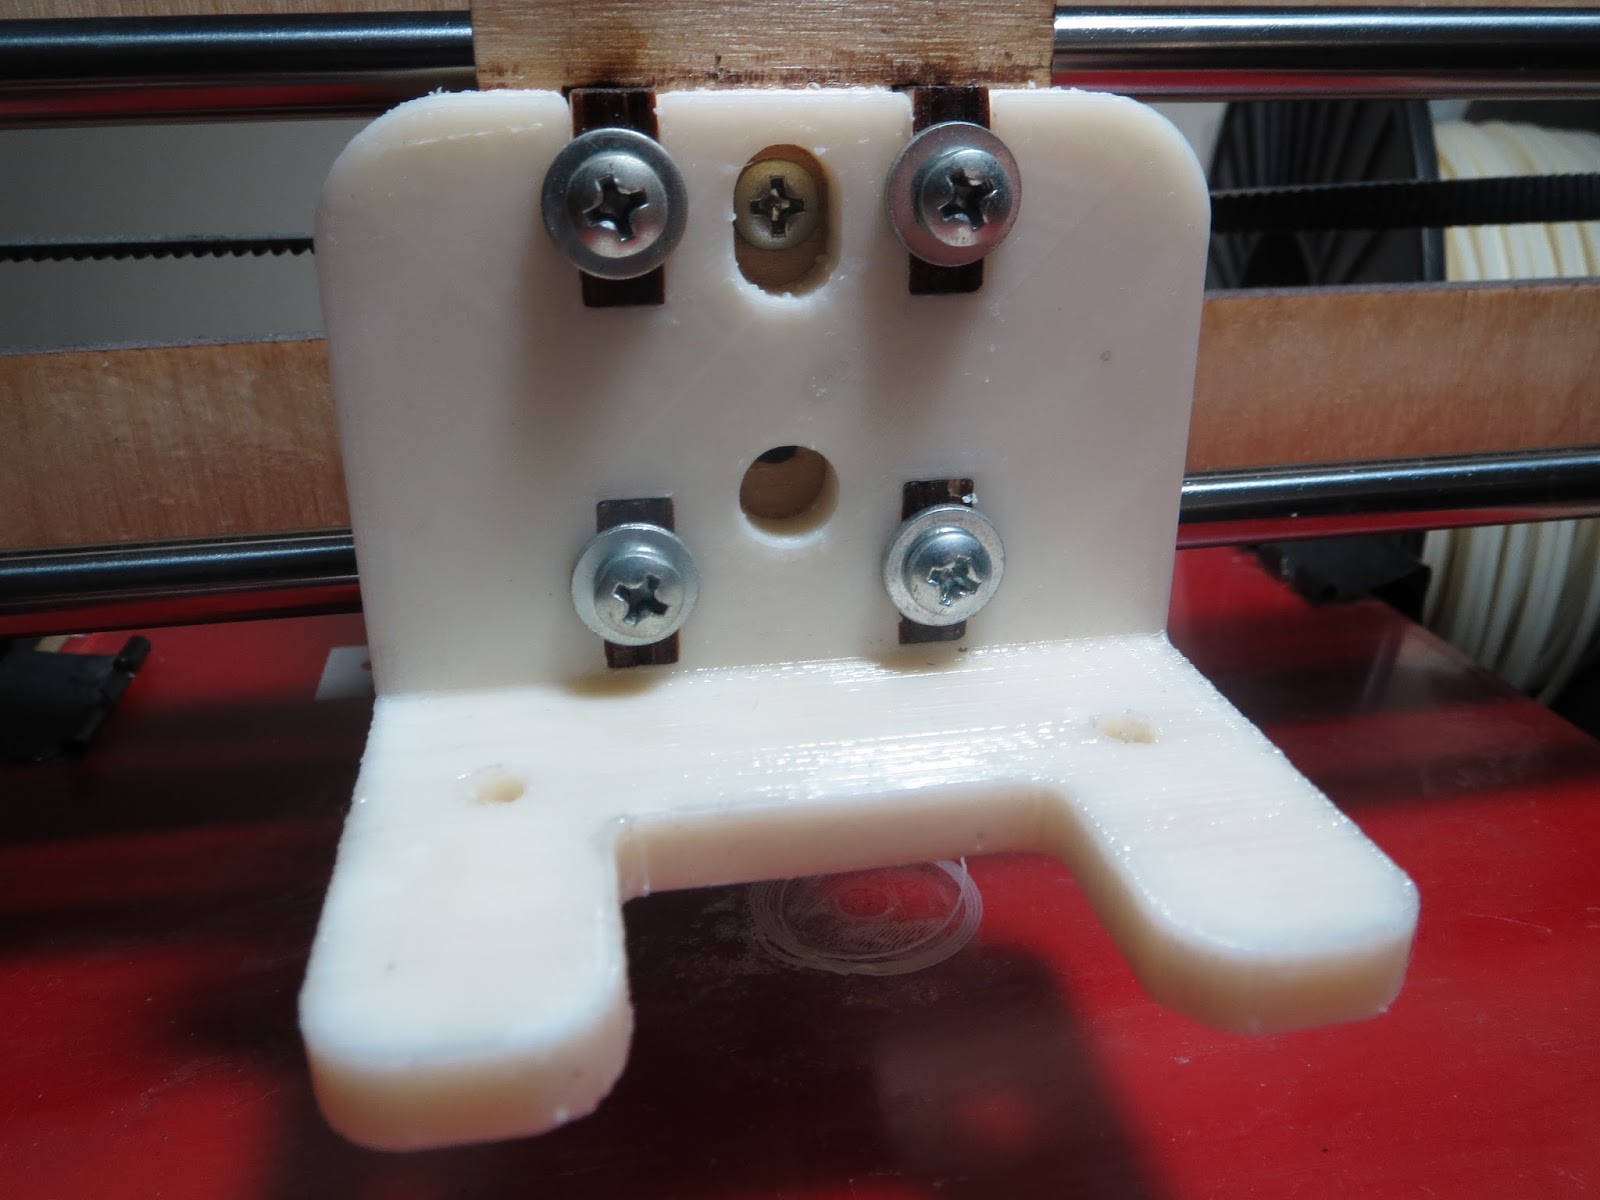
The X Ends have been redesigned from a press fit to a zip tie fastened operation. The design was actually inspired from the Printrbot Simple. I was able to run into Brook Drumm, the creator of Printrbot, at the Open Source Hardware Summit and had a nice long chat with him. We started talking about the Printrbot Simple and asked about his design decision in using zip ties to fasten the linear rods. Brook stated that even though he cut a lot of corners with Simple, zip ties works surprisingly well in fastening the linear rods. I figured I could do the same with the 3DPrintMi's X Ends since it takes a bit of muscle to press fitting the linear rods. The new X Ends is a big improvement, cutting 25% of it's original volume and knocks 30 minutes out of the print time. It requires 8 zip ties to fasten the rods but it's definitely a lot easier to assemble. Thanks for the advice Brook! 
X End Motor ver2

Last week, I exhibited the 3DPrintMi at Makerfaire NYC and got a lot of positive feedback.  I had a lot of fun besides being covered in dust by the end of the weekend. 

Nicholas Seward with his RepRap Simpson & Reprap Wally

I finally got to meet Nicholas Seward and his two repraps, the Simpson and Wally. He's a great guy and I really got to give him props for developing two completely different repraps in matter of months. The Simpson is really fun to watch and it's something out of a sci fi movie, sorta reminds me of the tripod monsters from Half Life. Wally looks very elegant yet sturdy. It's not as crazy as the Simpson but it's still unique in it's own rights. It was great to witness it come alive and print it's first piece. Nicholas was having a bit of trouble getting it to work at first since he told me the TSA handled it like a ragdoll during check in. Watching both run at the same time was definitely mind boggling. The reprap Morgan did make an appearance but not the creator, Quentin Harley. A few fellows from Minnasota? came all the way down to NYC to exhibit the RepRap Morgan. Another great machine and well deserved first place Gada Prize winner. Before I left, I was able to get a picture of all three Gada Prize winners together. 
Gada Prize winners!

More pictures here

Also want to say thank you to the people that sent me photos of their 3DPrintMis to showcase. People were really impressed that it can be repeatable. 


If you guys made it this far, if you can be so kind of to fill out a quick survey for me, that would be awesome. 

Wednesday, September 11, 2013

Build Log #37

Time for a quick build log. Logged about 10 hours of print using the 3DPrintMi Plus with the E3D Hotend and it prints great! I made a few changes to the new Direct Drive by adding a filament guide since the filament buckled as predicted. The only thing I dislike about the E3D is the fan mount. It doesn't have a tight grip on the heatsinks so it just vibrates, creating a god awful noise. I'm going to have to ziptie down because I can't have that type of noise during Makerfaire NYC.

Speaking of Makerfaire, I will be exhibiting the 3DPrintMi this year in NYC. I'm pretty excited and I hope 3DPrintMi gets at least some publicity. I really don't think the RepRap community knows about the 3DPrintMi, even after it placed third in the Gada Prize. When Josef Prusa did his presentation, "State of the RepRap," at the Open Hardware Summit 2013,  I was pretty disappointed that he only displayed the first and second place Gada prize winners, the RepRap Morgan and RepRap Simpson. For whatever reason, I just hope 3DPrintMi will make an impression at Makerfaire NYC. Please come see me at the 3D Printer Village!
Exhibit #11402

Also, I revived my first 3DPrintMi and gave it a new home. It now resides at the Hackerspace, Ideas to Things. 
3DPrintMi Mini

For those wondering about the Direct Drive extruder, it's now up on Thingiverse. So far, it only has the E3D mount but working on a Ubis and JHead. The Ubis is currently being tested and been hearing good things so far.
Vert Extruder


Little sneak peak on the re-designed X Ends I'm working on. 
Re-designed X Ends

Friday, August 16, 2013

Build Log #36 - New Kid on the Block!

Been helping a fellow reprapper in getting his 3DPrintMi up and running. Not only that, he's literally the first person to build my machine! 

Congratulation Luisimomaximo!

Luisimomaximo 3DPrintMi

It's an odd but awesome feeling that the 3DPrintMi resides somewhere other than my room. Looks great!


The 3DPrintMi Plus is done! The E3D Hotend is working way better than the QU-BD with no sign of blockage with PLA *knock on wood*. Still have to try using ABS but I don't see why it wouldn't work. The forced convection really helps in minimizing heat creep. Further testing is still needed but I'm feeling pretty confident with the E3D. The Direct Drive is also working without any hiccups but I'm keeping an eye on the filament in case it starts buckling. 

Introducing 3DPrintMi Plus!

Ready to be clamped down

Extruding 1.75mm PLA.


Hoping the filament won't buckle here. I should just add a cylinder in the next revision to guide it the hotend. 


Wednesday, August 14, 2013

Build Log #35 - Bigger bed, New Direct Drive extruder

Got a few pictures to upload. I had to re-print the Y carriage leg extenders 3 times since they were undersized. My mock CAD drawing of my 200mm x 200mm hot bed was off by a few mm since I was going off by the dimension I gathered off the internet.

Tearing down the 3DPrintMi. The small hotbed will be transferred to my new 3DPrintMi which is being built at the hackerspace, Ideas to Things.

Leg extenders easily snaps right in. 

Leg extenders

Leg extenders on and ready to be fastened. I had to drill out the extra holes. 
Fastened with M3 x 18mm screws. 

Didn't add that much weight which is good. Aiming to keep the Y Carriage as light as possible.
For the past few weeks, I've been developing a new direct drive extruder. As I convert my 3DPrintMi to a bigger bed, it was also time to try a new hotend, the all metal E3D. It's a well designed hotend and it's been getting a lot of positive reviews.  At first, I was going to use a Wade Extruder but it's a bit overkill for a 1.75mm setup. It's too top heavy for my taste even though it served me well on my Printrbot.  I really like the lever mod on my QU-BD and I want to continue using that feature. The CAD drawings of the E3D was incredibly useful during the development. Open Source FTW. 

Features on this this Direct Drive:
  • Can be mounted on any X Carriage with a Wade mount (50mm center to center)
  • Nema17 motor is positioned parallel to the X axis, suitable for Vertical X configuration.
  • Can utilize any lever mods readily available on Thingiverse.
  • Compact design gives it a low center of mass.
  • Direct drive extruder is separate from the hotend mount, can easily swap hotend mounts with different groove mounts.


3 Part assembly. Also printed out another lever mod by MickB. 

Extruder motor mount with lever mod.


Hotend mount with clamp. This one was designed with the 1.75mm E3D ver 4.1 groove mount

Assembled together

Mock assembly with the hotend and X carriage. 


Just need to wire it up and test it out.


I will release the files as soon as I finish testing direct drive extruder. May be done by the end of this week hopefully!


Tuesday, July 30, 2013

Build Log #34 - Custom QU-BD Mount

Documenting my custom QU-BD mount mod and this time I mounted the 2nd QU-BD extruder onto my Printrbot Plus. It's basically the same exact setup on my 3DPrintMi so it's fine to use this post as a reference. The advantage of this mod is that it allows you to mount the QU-BD parallel to the universal mount. The weight is evenly distributed and the motor isn't sticking it's fat ass out in the open. 


Universal Plate marked
Cut the blue line with a dremel, turning the holes into a slot. If you have a mill, use that instead. 


Should look like this. Cut as close as you can to the tangent.

File it down to get a nice straight slot. Debur the edges.

Nice and clean

Personally, I would scrap the filament drive block and replace it with MickB's lever mod. It's way better than using the screw and you won't be able to access it when you mount it.

Just need one nut on the stainless steel barrel. 

Use the other nut to lock the stainless steel tube on the cold end


Remove the 4 screws holding the extruder mount


Install the new extruder mount

Test mount.

Assembled with lever mod


I like to use teflon tape aka pipe thread tape to insulate my hotend. I would wrap the hotend with ceramic insulation and secure it with kapton tape. Then I give a few good wraps with the teflon tape, giving it a nice clean look. Stuff never burns.


Insert the universal mount and tighten the nut down.


Should have just enough space to insert the bolts. If you can't see the slots, it's on the wrong side.


Works on the first try. Yay.